Transform Your Stovetop by Clearing Burnt-on Mess
Posted on 24/05/2025
Transform Your Stovetop by Clearing Burnt-on Mess
Maintaining a sparkling clean kitchen often starts with your stovetop. Yet, for many, burnt-on messes can make your cooking space feel permanently grimy, no matter how often you tidy up. Are you frustrated by crusty spills and blackened gunk that seem impossible to remove? Don't worry! This comprehensive guide will show you how to transform your stovetop by clearing those burnt-on messes, restoring its shine and efficiency. Whether you have a glass, ceramic, or traditional gas range, these proven tips and tricks will enhance your kitchen's cleanliness, boost your home's aesthetics, and even improve your cooking experience.

Why a Pristine Stovetop Matters
A clean stovetop is more than just eye candy. Let's explore why dealing with burnt-on food and stubborn stains is essential:
- Hygiene: Food remnants harbor bacteria and germs, risking food contamination.
- Functionality: Grease and carbon build-up can hinder burner performance.
- Safety: Accumulated gunk can create fire hazards and unpleasant odors.
- Aesthetics: A gleaming stovetop uplifts your entire kitchen's look.
- Lifespan: Regular cleaning prolongs your appliance's durability.
Understanding Burnt-on Stovetop Messes
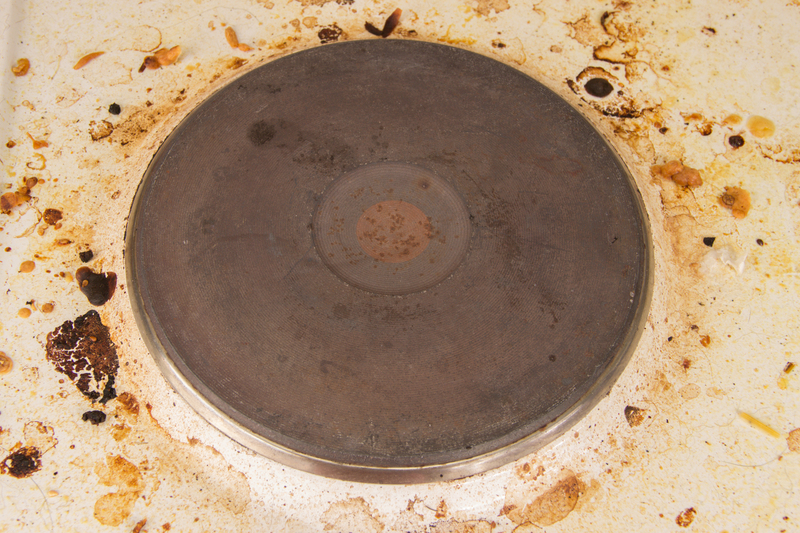
Burnt-on messes occur when food or liquids spill onto a hot stovetop and quickly caramelize or carbonize, forming tough layers. Depending on your stove type (gas, electric coil, glass-ceramic), messes can manifest as:
- Charred sugar or syrup stains
- Cheese or sauce build-up
- Oil and grease splatters
- Baked-on sauces or soups
*Tackling each type of grime effectively requires understanding your stovetop's surface and appropriate cleaning agents.*
Essential Tools and Supplies to Prepare
Before you begin to clear burnt-on mess from your stovetop, gather these key supplies:
- Baking soda: Mild abrasive, lifts tough spots
- White vinegar: Cuts grease and neutralizes odors
- Dish soap: Removes general grime and oils
- Razor scraper or plastic spatula: Scrapes off stubborn debris (for glass stoves)
- Non-abrasive scrubbers or sponges: Prevents scratches
- Microfiber cloths: Polish and buff surfaces
- Old toothbrush: Cleans corners and tricky spots
- Gloves: Protect your hands from chemicals and grime
How to Remove Burnt-on Mess: Step-By-Step Guide
Ready to transform your stovetop by removing burnt-on messes? Follow these detailed steps to ensure a thorough, effective clean for every stovetop type.
1. Ensure Safety First
*Always make sure the appliance is completely cool and disconnected from power (if applicable) before you start cleaning.*
2. Remove Grates, Burners, and Knobs
- Take off any removable parts. Soak grates and burners in hot soapy water.
- Let them sit for at least 15-20 minutes to loosen grease and residue.
- Scrub parts separately using a stiff brush or scouring pad, then rinse and dry thoroughly.
3. Tackle Surface Spills and Debris
- Use a paper towel or damp cloth to wipe away any loose debris, crumbs, or burnt bits.
- If you have dried or extremely stubborn mess, soften by laying a hot, damp towel over the area for several minutes.
4. Apply Baking Soda Paste
- Mix 3 parts baking soda with 1 part water to create a spreadable paste.
- Generously apply the paste to all affected areas, concentrating on burnt-on stains and crust.
- Let the mixture sit for at least 20 minutes (longer for severe grime).
5. Degrease with Vinegar
- Spray white vinegar over the baking soda paste. It will fizz and break down grime further.
- Let the chemical reaction work for a few minutes--this helps lift both acidic and oily stains.
- Wipe with a damp sponge or microfiber cloth.
6. Scrub Carefully
- Use a non-abrasive scrubber or sponge to work on the visible residues.
- For glass tops, a plastic scraper or razor blade (held at a shallow angle) can carefully lift stubborn, burnt-on spots without scratching.
- Work in small circles for best results.
7. Rinse and Repeat
- Wipe away baking soda and grime with a damp microfiber cloth.
- Repeat the paste and scrubbing process for any remaining stubborn spots.
8. Polish and Buff
- For glass or ceramic stoves, finish with a dedicated stovetop polish or a small dab of glass cleaner.
- Buff the entire surface with a clean, dry microfiber cloth for a shiny, streak-free finish.
9. Reassemble and Enjoy
- After all surfaces and parts are completely dry, reassemble your stovetop.
- Take a step back and admire your transformed, burnt-on-mess-free stovetop!
Special Tips for Different Stovetop Types
Your cleaning method may vary based on stovetop material.
Glass and Ceramic Stovetops
- Never use steel wool or abrasive pads.
- Use only recommended stovetop cleaners and plastic blades.
- Regularly use a vinegar-water solution to maintain shine.
Gas Stovetops
- Soak and scrub burners and grates separately.
- Inspect gas ports for blockages--use a toothpick or soft brush to clear.
- Ensure everything is dry before reassembling to avoid rusting or gas blockages.
Electric Coil Stoves
- Unplug coils before cleaning.
- Wipe drip pans with degreaser and polish coils if needed.
- Never soak the electric components.
Common Mistakes to Avoid When Clearing Burnt-on Mess
- Scrubbing with metallic pads, which can scratch and dull your stovetop
- Using harsh chemicals that can discolor or damage stove surfaces
- Leaving burnt-on spills to set for days--immediate action is easier!
- Soaking electrical or gas components when cleaning
- Skipping regular maintenance once your stovetop is pristine
*Gentle yet thorough methods guarantee the best results, preserving both function and form.*
Natural Methods vs. Commercial Cleaners
While store-bought degreasers can be effective and convenient, many eco-conscious homeowners prefer natural solutions to clear burnt-on stains from the stovetop. Let's compare the two:
- Natural Cleaners: Baking soda, vinegar, and lemon juice are great for everyday cleaning and lifting light-to-medium messes. They're non-toxic, safe for families, and cost-effective. Plus, they help neutralize odors and disinfect naturally.
- Commercial Cleaners: Specifically designed for burnt-on grease and carbon deposits. They can work swiftly on tough or old messes, but read all manufacturer instructions to avoid surface damage or skin irritation. Always ensure good ventilation when using chemicals!
For most households, a combination approach works best: stick to natural methods for weekly cleaning and turn to commercial solutions for deeply baked-on messes or occasional heavy-duty restoration.
How to Keep Your Stovetop Looking Brand New
- Wipe spills immediately: Fresh messes are much easier to clean than dried-on debris.
- Dedicate a few minutes weekly: Even when it looks clean, regular wiping prevents build-up.
- Use stove burner liners: These catch spills before they harden, especially on gas stoves.
- Polish glass/ceramic tops: Use stovetop polish monthly for lasting shine and protection.
- Avoid overflows: Use lids and monitor pots to reduce boilover mishaps.
- Deep clean monthly: Fully disassemble, soak, scrub, and polish all components on a set schedule.
*Remember: Consistency is key! A few minutes today saves hours of scrubbing tomorrow.*
Stovetop Transformation Success Stories
_Hundreds of home cooks have mastered the art of clearing burnt-on mess from their stovetops, turning disaster zones into gleaming, inviting kitchen centers._ With the right tools and routine, anyone can experience a similar transformation.
- "I thought my glass stovetop was ruined, but baking soda and a plastic razor made it look new again!"
- "Regular vinegar sprays mean I never worry about greasy stains anymore."
- "Homemade paste cleaned what chemicals couldn't. I wish I'd known these tips sooner!"

Frequently Asked Questions About Clearing Burnt-On Messes
Can I use a razor blade on any stovetop?
No. Only use a razor blade or plastic scraper on sturdy glass or ceramic tops--and always at a low angle to avoid scratching.
What if my burners are rusty after soaking?
Use a wire brush to remove rust, then dry thoroughly. Coat with a bit of oil to prevent future rust.
Are there preventative cleaners I can use?
Yes, many brands offer stove top protectants and easy-wipe mats. You can also create your own natural spray with vinegar and lemon oil.
Conclusion: Reclaim Your Kitchen--Transform Your Stovetop Today!
The journey to a spotless kitchen begins with your stove! Clearing burnt-on messes from your stovetop doesn't have to be an overwhelming chore. With easy-to-find supplies, savvy techniques, and a little regular care, anyone can transform their stovetop--and their entire cooking experience.
Ready to give your kitchen a makeover? Start by tackling those stubborn burnt-on stains and enjoy a kitchen that feels fresh, safe, and wonderfully inviting every single day. For more cleaning and home improvement tips, keep exploring our blog--you'll discover the best solutions for every messy scenario!
Clean, cook, and shine--your beautiful stovetop awaits!


